How To Get Started With o365 Phishing Simulation Training For Free
This year I am taking responsibility for phishing training at the company I work for. I have evaluated a few different tools in preparation for this and thought this one was definitely worth sharing. Especially if you already use o365 at your place of work.
Today I will walk you through the o365 Phishing Simulation tool(Attack Simulation Training).
Free Trial
First, we will sign up for the 30-day free trial E5 license. This license will include more than what we need. The E5 license is an enterprise plan that comes with Attack Simulation Training by default.
For more information about the Microsoft o365 E5 license, visit this page.
Also, you can find information about o365 Attack Simulator requirements on the Microsoft docs here.
First, we will sign up for the free trial:

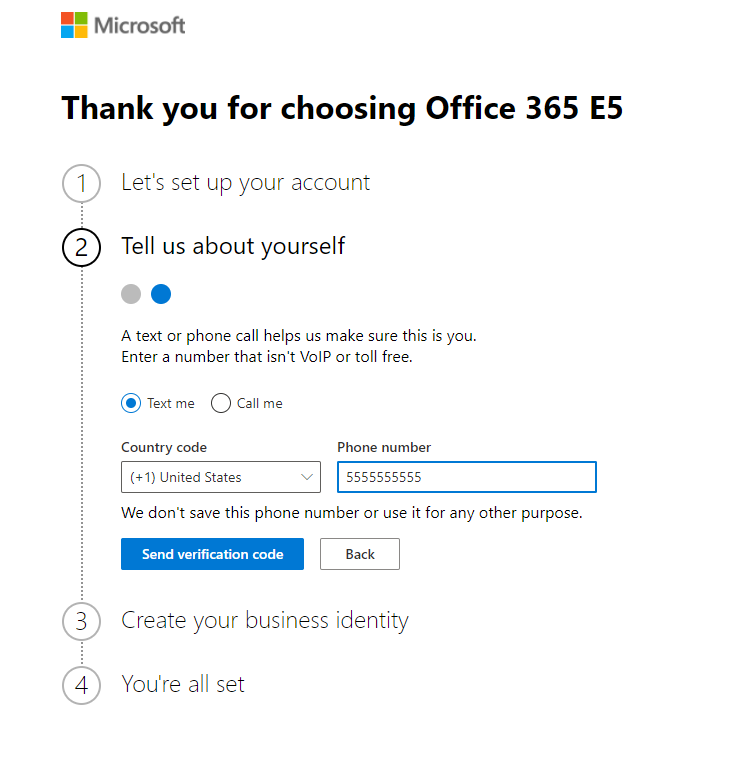
It will ask you to provide information about your organization:

We will be asked to verify our contact information, and then we are good to go:
I created two users from the Admin dashboard, Bugs Bunny and Daffy Duck, in a “Sales” group to simulate a department in the organization. These are normal o365 users who will have access to office services and outlook mailboxes.

Launching a Simulation
To launch a simulation, you must enable auditing in the o365 settings, and the user who launches the simulations must have multifactor authentication enabled.
We can view the Attack Simulation Training in the “Security” dashboard. Here, we can also view the overall results of security training, the number of users who have participated in the simulation training, and the number of users who have taken the follow-up training.

To view the overall simulation details of ongoing, scheduled, or past simulations, navigate to the Simulations tab. This page displays an overview of simulation details such as the status, technique used, number of compromised users, and the simulation dates. Simulation details are retained in this dashboard for 90 days.

To launch our first simulation, we click the launch simulation button.
The first step in creating our simulation is choosing the technique to use for the phishing campaign.
Right now, o365 supports five techniques:
Credential Harvesting
Malware Attachment
Link in Attachment
Link to Malware
Drive-by URL.

We will use the Credential Harvest technique for this demonstration. Now we select a name for our campaign and provide a description:

Next, we choose our payload. O365 provides 98 payloads by default. In this demonstration, we selected the Black Friday Offer payload. We can also create our own payloads to use, but we will not be going into that in this post.
This payload has a low predicted compromise rate of 20%. The compromise rate is related to the complexity of each payload.

Next we select the target users for this simulation. The targets can be any user in your tenant, Azure AD or you can provide a CSV. We will target our Sales group (Bugs Bunny and Daffy Duck).

Now we can select our training preferences. By default, the simulation provides recommended training based on the payload you choose. Microsoft recommends using this option.

For this demonstration, we will specify the training we wish to send. We can choose to send training to all users of the simulation, or we can be more granular. We can send the training to users who clicked the link or users who fell for the phish. In other words, we can choose to send training to users who entered their credentials.

For this demonstration, we will send one training to users who have clicked the phish and the users who entered their creds. We will send an additional training module to those who have entered their credentials.

Now we select our landing page. This is provided by default, it will show the indicators of the phishing website and a message alerting the user that they have been phished. We can modify this message if we’d like to but we are going to leave the defaults on this one.
Finally, we are ready to launch our simulation. We can schedule our simulation for some time in the future or we can choose to launch immediately. Attack Simulator also provides the capability to send in the nearest work hours based on the users’ location.
Before we launch we must specify the simulation duration (at least 2 days) and the training deadline.

Now we can send ourselves a test email if we would like to test it before submitting the simulation.

If we are satisfied with our email example we can submit the simulation for launch.
User Experience
Now, I will log in as Bugs Bunny to demonstrate what this looks like to the end-user. Here is the email Bugs Bunny receives:

Bugs Bunny wants to get in on these Black Friday sales! He clicks the hyperlink. He logs in to see what deals are available:

As you can see, by default, o365 provides a friendly reassuring message on the landing page that alerts the user that they have fallen for a phish. Indicators are highlighted with explanations to teach users how to spot a phish/phishing website.

Soon after the simulation experience, Bugs, Bunny will receive a calendar invite to the assigned training. I really appreciate this feature as it allows users to block a specific chunk of time for this training. However, each training is no more than a few minutes.

As Bugs Bunny, I clicked on the training link to view the training assigned to him:

Each training module is closely related to the payload the user received. Each training ranges from 4-7 minutes long, containing a small quiz at the end, or a few questions throughout the videos to ensure the user walks away with the knowledge to help protect them against future phish.
Results:
In this campaign, 3 users have been simulated, the admin user and the 2 users in the sales group. We can see which users clicked the payload, which users reported, and which users were actually compromised (entered their credentials). We can also see which users completed the follow-up training.

Another cool feature the simulator provides is a recommendations box in the bottom left. This contains recommendations based on the type of technique/payload used in the simulation.